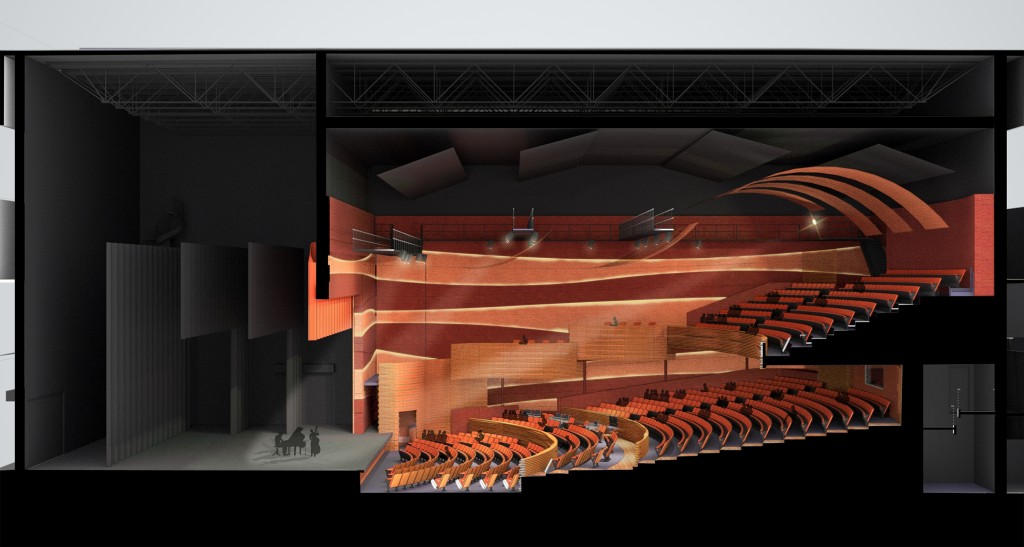
The task was to produce 3 renderings for this Theater we are designing in 3 days. We had brought the basic file from revit into sketchup. In sketchup we could make the all the small design choices to later present to the client. After we had our designs pretty much down, I began work on the renderings.
Usually our (you and I) renderings consist of exteriors of our buildings, or light filled interiors. Architects always want to show that lots of light is entering the space, and most times we don’t even need to add artificial lighting to our scenes. In these series of renders, the task was to be different. For the first time, I had a scene with absolutely no illumination from the sun.
At first I wanted to bring the model from sketchup to Rhino. But after trying an import, Rhino was running extremely sluggish with the 1250 seats. It was really painful. Since my end goal was a rendering, and all the modeling was complete, I decided to just use the maxwell plugin for sketchup. We had already assigned materials in sketchup and I would have had to recreate all of them in rhino.
In times past, to achieve lighting from emitters, I would take the watts of the lights and set them to about 1000+. Everywhere I read, people say this is a very bad practice in maxwell, and will produce very grainy images. Theaters are also all about the lighting, thats what makes a theater look like a theater. The first and most important thing I found was adjusting the EV levels in maxwell. These levels can not be adjusted while the image is rendering, like the ISO / Shutter. The EV informs the fStop, along with the shutter and ISO, which of course can be altered during the render. I found the default EV was set at 14. This setting is great for any exterior or interior with a lot of light, but for an interior, it needs to be cut in half to at least 7. I think I rendered mine at an EV of 6. By dropping this number it allows all your 100w emitters to actually give illumination to the scene.
Secondly, I discovered IES lights. In maxwell’s material editor when you go to create an emitter, you can set it as an IES light. This gives the emitter actual lighting effects. For example, if I apply an emitter to a sphere, it will illuminate an equal amount to a 360 degree radius. An IES light can specify the difference between a spot light, a flood light, a down light, and so forth. In my scene I used several different types of IES lights, as necessary in the theater. Here is the 10 hour render of the above scene with no post process.
As you can see there are lots of different lighting effects in this scene. And since its maxwell I can constantly change the intensity of these lights. Before changing the EV levels I would have to crank my lights up to the highest they would go to even see them. With the EV set at 6, most of these lights range at 10-25% full power. The lights under the balcony were at their lowest settings actually, and were still reading pretty hot. I used the incorrect IES lights for those, I think I just put the spotlights under there, but didn’t have an extra 10 hours to re-render, oh well.
To really make this image look dramatic, I brought it into photoshop and did a lot of post processing. I wanted this image to feel like you were presenting on a stage in front of a rather packed house. I added a lot of outer glows to the lights and lots of people. Below is the final image.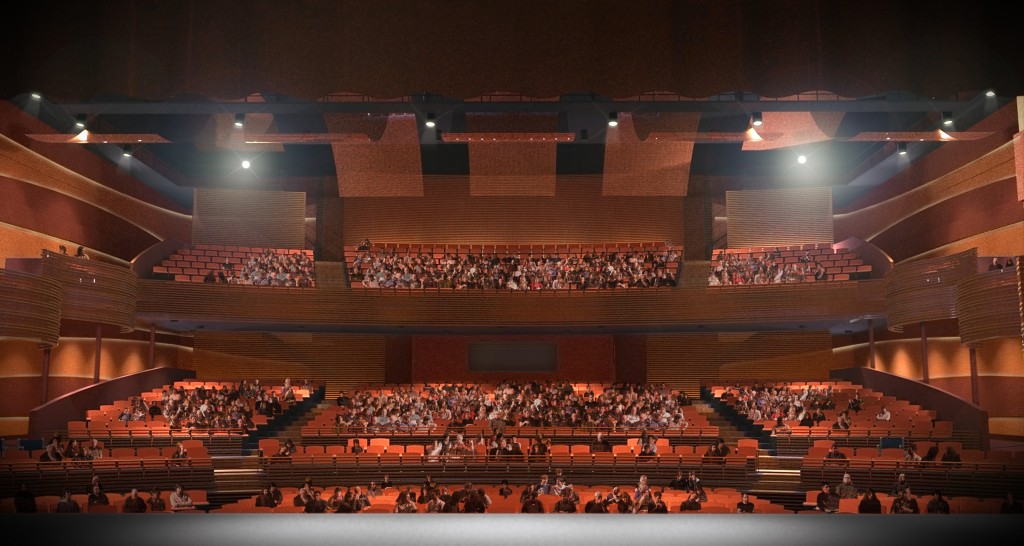
As you can see those lighting effects really take the image to the next level and make it feel like you are standing there. Side note: photoshopping all those people were a pain… The end image is a little bit grainier than I would like, I think SL 15.6 or something, but that’s kind of what you get with an all artificially illuminated scene, and 10 hours render time. By no means is maxwell the quickest render engine.
Here are the other 2 images.
I would have liked to add more people to this one, but ran out of time. Also Alicia Keys (at request of the project manager) could have been worked in a little better.
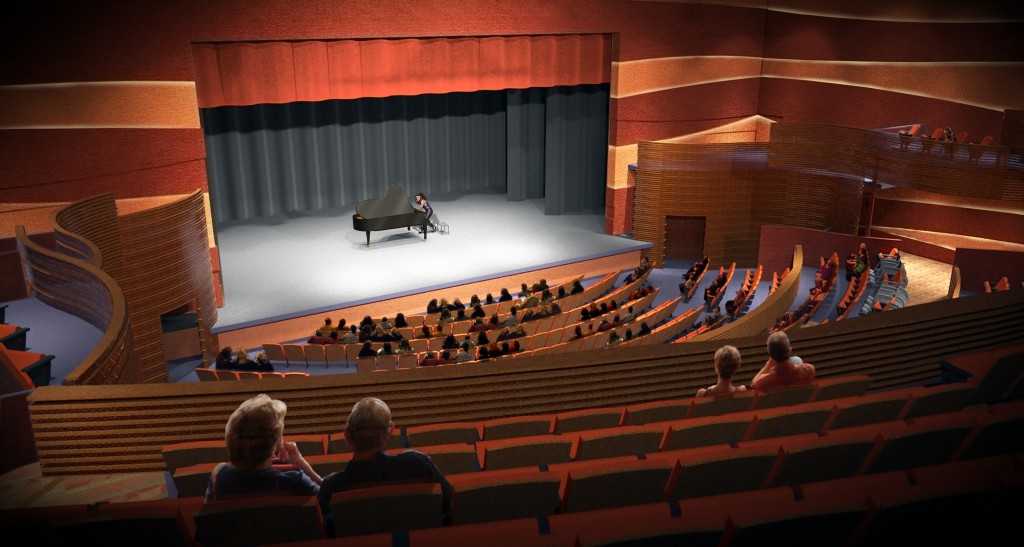
The lighitng effects look great! It has a very theaterlike feel. This makes me re-think using more sketchup in the future. The info on the EV levels is very helpful. Photoshoping all those people looks like an augean task. The image looking out into the audiance is my favorite, but I also really like the perspective section.
One more though on this post. You talked about rhino running really slow with the 1250 seats. I have never done this myself, but I have read a bit about it. When you have a repetative geometry ie the theater seats, and it is too much for rhino the thing to do is to create a proxy, which means instead of the file dealing with 1250 seperate pieces of geometry it only has to deal with one, in a way it is similar to how sketchup uses compontents. Using proxies aparently makes files much more manageable, and it greatly cuts down on the amount of ram it takes to export mxi files. and it renders just the same as if you had put in all 1250 seats. Might be worth looking into next time. often times that is how they do leaves on trees modeled just for rhino.
Thanks for the comments.
You are certainly right about using proxies. They are the (only) way to go about doing stuff like that.
I really want to learn more about using Proxies. I know people use them all the time in 3ds max. I see people render these aerial views with forests, thousands of trees all comprising of 10,000+ polys. Have you ever used them in rhino? I tried looking into it and came across rhinoscript stuff that was over my head. I never actually figured out how to do it.
I think to use proxies you have to do it through maxwell render / what ever rendering engine you are using
Always maxwell, Have you gotten it to work through maxwell? studio / rhino plugin?
That is good stuff to know about the EV levels and reducing noise. These images look really nice and I am impressed by all the people; that must have taken forever to put them all in there. I think you put just the right amount of variation in the patterns of people and their shading in order to make it convincing. In the end it is still the lighting effects that sell the image for me. What do you use for your fixtures and did you just place an IES light inside of each one or do they have modeled mirrors/lenses? did you model them or are they 3d wharehouse?
Thanks Steve,
As far as the IES lights go, I just modeled really simple fixtures. Just cans, with a luminaire in them. Then whatever I was ‘calling’ the light I applied the material to them, just like we normally would. I would definitely avoid adding mirrors and lenses. for such a complex scene that would mean adding a lot more light refractions, and bounces.As far as creating the emmitter itself while in sketchup create a new material. Then under the type, where it says automatic, drop down to the last option, which is IES file. Then you can load your IES file. If you don’t have these, you can get them from next limit’s download center, or just by googling IES files. To better preview the IES file, change the ‘scene’ dropdown to emitter_ies. This will change the ‘preview maxwell ball to something where you can see how the light is acting.
Hi!
Sorry I’m responding to this so late, i know it hasn’t been active for about a year. Ive been studying scenic design for over a year and have just gotten in to using sketch up and learning the ropes to that. I was just wondering if i could download your sketch up model to use as a space to work on my scenic design? Its solely for personal use and it won’t be shared with anyone or shown to anyone. I know this is probably a long shot, this is probably just the best sketch up theater design I’ve ever seen. Let me know!
Hi! Is there any possibility of downloading this model? Solely for recreational use.